All dough recipes are good in their own way, but yeast is especially popular. This is not surprising, because rich pastries always manage to be lush, fragrant and very nutritious. You can also store yeast dough some time before it is used. A rare hostess will refuse such an opportunity to make preliminary preparations, so that at the right time quickly prepare the finished dough. Even after defrosting, yeast dough retains its taste, aroma, ability to rise well, form a lush crumb and a golden crust during baking.
The specific shelf life depends on how to store the yeast dough at home. The longer - the more important it is to properly store the yeast dough and properly prepare it for further use. But with the same success you can store yeast dough for pancakes and pies, rolls and puffs, sweet (butter) and not sweet (fresh). And this is especially convenient for those generous culinary specialists who do not know how to knead a little dough. If you know how to store yeast dough, then you can not be afraid to make it in excess: nothing will be lost, everything will work and go into business, that is, it will become fresh and mouth-watering baking.
Can yeast dough be stored? Shelf life yeast dough
Frozen puff pastry, including yeast, is sold in all supermarkets. This means that you can store yeast dough in the freezer, and long enough if you do not freeze it again and observe all storage conditions (temperature, humidity, hygiene, etc.). What about short-term storage? Recall the culinary department in grocery stores: there you can buy ready-made yeast dough, fresh and soft, not frozen, but chilled. Such a dough never lingers on the counter: it is quickly dismantled by customers. Moreover, even elderly housewives are buying, and their experience can be trusted!
But if even these arguments did not convince you that you can safely store the yeast dough, let's turn to the facts proved by chemists, doctors and bakers:
- The basis of any dough is flour and liquid (water, milk and / or other dairy products). Both of these components perfectly tolerate freezing and thawing. The liquid changes the state of aggregation without problems, and even very low temperatures are not afraid of flour. As for yeast, when frozen, they do not die, but simply “fall asleep”, stopping their life processes. At low, but not subzero temperatures, the yeast continues to ferment.
- It is for the latter reason that it will not be possible to store yeast dough in a refrigerator for a long time. The maximum you can count on is to keep the yeast dough until tomorrow, but it is better to use it for one day. Otherwise, if you leave the pastry on the shelf of the refrigerator for a couple of days or longer, the fermentation processes, although slow, will lead to acidification of the dough, after which it will only be thrown away.
- But in the freezer, the yeast dough is stored for weeks, without losing its taste and physico-chemical qualities. To take advantage of this convenient property, you need to freeze correctly, and then properly defrost and prepare the yeast dough for use. The more time the pastry spends in frosty suspended animation - the deeper the dough freezes, and the more carefully it will be necessary to get it out of this state. First, let the yeast dough thaw, then warm at room temperature, and then rise.
How to store yeast dough in the refrigerator?
Ready-to-use yeast dough will wait a bit without any problems while you have time to bake. This is very convenient for those working mothers who need to feed their family a delicious and nutritious breakfast every morning. You can cook and store the dough for yeast pancakes in the evening, prepare dough for pizza and pies:
- For storage in the refrigerator, take a little dough - as much as you use at a time.
- Gather the dough in a bowl, wash it with your hands and brush with a little vegetable oil.
- Place the dough in a clean, dry plastic bag, tie and make a small hole in the air bag.
- Air circulation is necessary because when cooled, the aerobic fermentation of the yeast slows down, but does not stop.
- Put the dough in the bag on the top shelf of the refrigerator (or the bottom if the freezer is on top).
How to store yeast dough in the freezer?
Yeast dough, especially puff varieties, tolerates freezing. If your refrigerator has a good freezer, you can safely count on 2-3 weeks of storage. Ready-made yeast dough is rarely sold in small portions, and it’s problematic to use the whole kilogram you bought. Therefore, before freezing, divide the dough into portions for single use and follow the instructions:
- Use special containers and / or bags to store food in the freezer. From the inside, grease them with a drop of vegetable oil or sprinkle with a pinch of flour.
- It is advisable to wrap puff pastry intended for freezing in plastic wrap and then roll it up (like in store bags), otherwise it may become too dry.
- At a temperature of about -15-18 ° C, the yeast dough will last 2-3 weeks and even longer if you don’t get it, do not defrost the refrigerator with the dough and do not re-freeze it.
Speaking of pastry! Butter, that is, sweet yeast dough is stored less than fresh. Sugar makes the dough more nutritious for yeast, which means it speeds up the fermentation process. Therefore, sweet buns or jam pie is better to bake on the same day or the next day. But fried pies, kulebyaki and / or pizza will turn out on the second day of storage of the dough in the refrigerator. In a word, choose the right type of yeast test, store it and plan your home menu in advance, fortunately, this allows live dough. Bon appetit and soft pastries in your home!
WHAT TO PREPARE FROM TEST RESIDUES
Often they bought or made yeast dough themselves, prepared the desired pie and you still have a piece of dough, which is called "neither there nor here." And the second pie is not enough, and the filling is over, and you don’t know what to cook from the rest of the dough. Here for such cases, take advice from the cook. Without a small amount of dough, products can be prepared without filling, and special buns, pretzels, bagels, crackers, which can be prepared not only from, but also from the remains of yeast dough, can be of particular trouble. It’s good if you have pastry left, then baking will be even tastier.
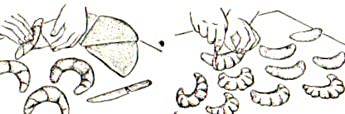 We cook pretzels from yeast dough. Put the dough on the table, sprinkled with flour and giving it the shape of a ball to roll into a tourniquet, so that the middle was wider than the ends. The rolled tourniquet must be laid on a baking sheet and shaped into a pretzel; on top, the pretzel can be decorated with a Christmas tree cut out from the rest of the dough. A pretzel can be weaved from three plaits in the form of a pigtail and also bend the obtained braid into a pretzel in the form of a heart.
Pretzels on the baking sheet should be allowed to stand for 30 minutes, during which time the pretzels will increase in volume and become lush after baking. Prepared pretzels should be greased with a beaten egg and sprinkled with chopped nuts or shtrezel, then put in the oven and bake for 30 minutes at a temperature of 200-210 degrees. If the pretzel is not sprinkled before baking it, after baking it can be sprinkled with powdered sugar.
For cooking horns, you can also use the leftover dough. To do this, roll out the dough into a layer 5-6 mm thick, cut into pieces in the form of a wedge. Useful advice from the cook, so that it is easier to make wedges for bagels of the same size, the dough sheet should be given a round shape and cut into straight segments. Then roll each wedge into a roll. If there is marmalade or candied fruit, you can put them on the wide edge of the wedge and make horns with filling. Laying the horns on a baking sheet to bend the crescent-shaped horns. To make the baking varied, the outside of the bagel can be cut with a knife. Allow to distance and bake at 240 degrees for 20 minutes. Sprinkle ready-made horns from the rest of the dough with powdered sugar, even without filling they are perfect for tea.
Fingers made of yeast dough. Fingers do not need a lot of dough, so they can easily be prepared from the rest of the dough from making pies, if there was not enough filling. Roll the dough into a tourniquet and cut into small pieces, shape each piece into a ball, and give the ball the shape of a finger 8-12 cm long. Dip the fingers in melted butter and put on a baking sheet in rows. Let the fingers stand for 50-60 minutes and bake at 220 degrees for 20-25 minutes.
 Dough figures for children. From the remains of yeast dough, you can make figures in the form of animals, birds, flowers and mushrooms. It's easy to make fish or cherry berries on a twig and even a squirrel. A little flour should be added to the rest of the dough so that it becomes steeper, then the figures will turn out more natural. Roll out the dough into a layer with a thickness of 8-10 mm and cut it out with tin molds or stick with your hands what figures you want. Finished figures must be put on a baking sheet and greased with an egg. You can decorate the figures sprinkled with grated nuts, poppy seeds or raisins.
The figures should be allowed to distance for about an hour, they will rise well and take their natural form. Then you can bake in a preheated oven at a temperature of 220-230 degrees for 15 minutes.
Homemade crackers from the dough. Rusks can be prepared from the remains of yeast dough, of course the dough can be put in the freezer until next time, but it is better to use. After all, you can make excellent crackers that can be served with tea or . This is especially interesting for children.
Roll out the dough into bundles of 10 cm and place on a baking sheet, squeeze their edges, allow to distance, until they rise well. Lubricate with a beaten egg. Then bake at 220 degrees until tender. Let the harnesses stand for about 24 hours. The next day, cut the plaits into thin slices and spread on a dry baking sheet, dry for 20 minutes at a temperature of 190 degrees in the oven.
You can cook crackers with raisins, if you mix it in the remnants of the finished not fancy pastry. You can make crackers with sugar if the dough is simple. For this, slices of crackers after cutting the tourniquet on one side should be dipped in a mixture of milk and eggs (1 egg in 0.5 cups of milk) and dipped in sugar, and then put on a baking sheet with the sugar side up to dry.
Small cinnamon rolls. If you have some dough left over and have cinnamon, you can make buns. Divide the dough into small pieces and give them a rounded shape. Excess flour must be shaken off. Pour sugar mixed with ground cinnamon onto a plate. Dip the balls from the dough into sugar and squeeze a little so that they are covered in half with the mixture. Then put the buns on a baking sheet greased with oil, sprinkled side up. In the center of each bun, finger indent a finger and put cherry jam or candied fruit in it. Buns should be allowed to distance, then bake at 210 degrees for 20 minutes.
Someone like that, but it happens to me. Everyone wants to drink kefir for the night, then nobody needs it ... Then we want to eat pancakes with sour cream, and then suddenly we see our fifth point in the mirror and sharply decide that we don’t eat anymore. It is clear that this "more" will not last longer than two days, but the open sour cream must be capitalized somewhere.
Fig. 1. Dairy leftovers in the refrigerator
So you collect all these residues and think what to do with wealth. The option with the pancakes disappears, the sour cream is forbidden, and without it it is not tasty (oddushki were not on the black list).
Total we have: one and a half glasses of kefir, a glass of milk, half a can of sour cream, a little butter.
There is nothing to guess. You need to put the dough, and from the dough you can always make a lot of things and tasty for tea and as a main dish for dinner.
So, once again we open the refrigerator and other stores and add yeast to our milk, you can also corn, sugar, salt, sunflower oil and steam. The gentlemanly set for the test is ready. Getting to the test.
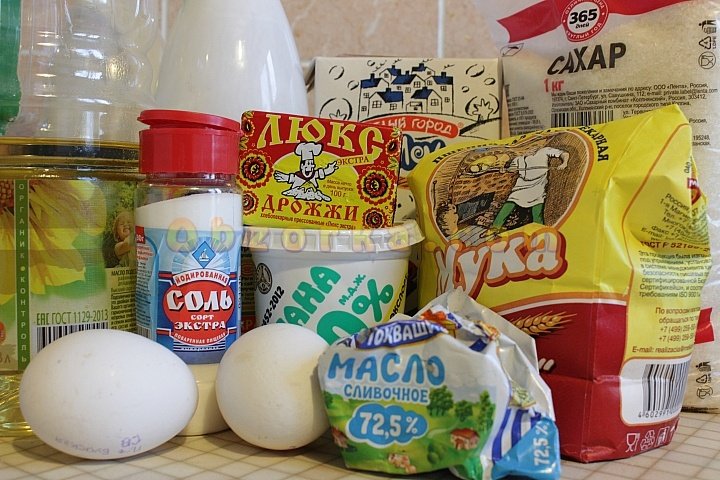
Fig. 2. Products for the preparation of yeast dough
When I cook from leftovers, and even rich ones, I use the sponge method of preparing yeast dough.
First, prepare the dough.
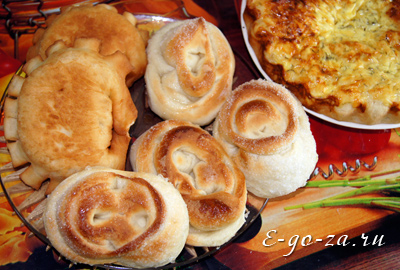
Buns will satisfy the first hunger, caused in many respects by their amazing smell, and the remaining dough will help to make a satisfying and tasty main course - a pie.
Pie - the main dish of dough
You can make it with what is in the refrigerator. We carry out an audit of stocks. You can make a pie with and herbs or spring onions and. You can, you can with cabbage. The easiest way to make a pie with fish. For him, you can take both, and, having previously removed the bones from them. And a couple of finely chopped onions. And if from canned food, then also a chopped boiled egg.

Fig. 5. Options for the filling: fish fillet, sausages, canned fish, meat with onions and potatoes
A pie filling can be literally anything. Read at your leisure old Russian recipes, there are pies with which just did not bake! And what are we worse? We are even better. We have more choices. So we carry out an audit in the refrigerator and cabinets and we send everything that needs to be eaten to the filling. According to the principle of closed pizza from yeast dough.
It is important to remember the three basic rules.:
- you can not put large pieces, because a) will not bake and b) break your teeth when you eat
- you can’t take everything too dry, i.e. just rice porridge in the dough will not taste good, you need to add something that gives juice - onions, cheese, dried tomatoes, olives, pickled cucumbers or soak in sauce
- you can’t put it too wet, it will ruin the dough
Do not be afraid to experiment! So you will find your signature filling. After the filling is ready, we begin to collect the pie
The dough is divided into two parts. One roll out with a 1 cm thick cake and put in a greased form, repeating its bends. Then put the filling in the recess. If the filling is wet, then sprinkle flour on the cake.
Roll the second part of the dough into a cake and cover the form with the first cake and filling. We pinch the edges. From the remains of the dough we can make decorations.
We make a hole in the middle for steam to escape, grease the top with egg yolk and send the cake form to the preheated oven for 50-70 minutes. And voila, the fish pie is ready!

Fig. 6. Pie with fish filling
If you are not too lazy, then we can make pies or hot dogs, if there are sausages in the refrigerator.
No matter what. The main thing is its own pastries, fresh and fragrant.
And all the products were used and the family was deliciously fed.
And now you can treat yourself to some good movie.
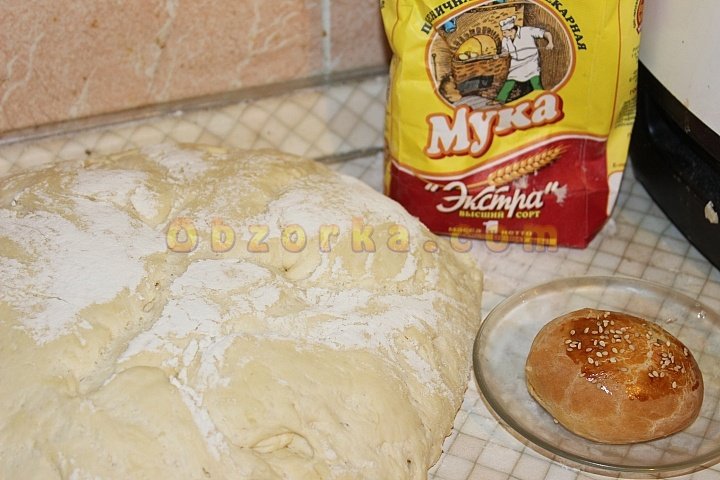
Fig. 7. The secret recipe for comfort in the house
I delegated further work with the dough to the bread maker. She, as always, did a great job, and as a result I have a magnificent yeast dough. My bread maker, my assistant, I can’t stop rejoicing!
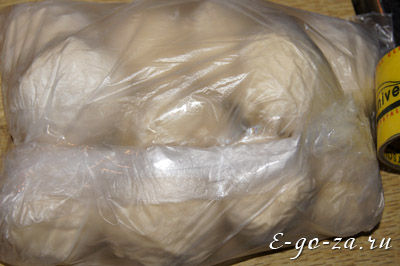
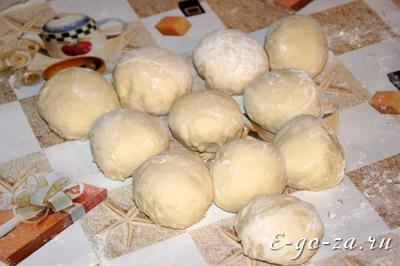 But here is one problem, baking pies is not at all in my immediate plans. Well, the problem is not a problem, baking can be postponed for several weeks. After all, the yeast dough is perfectly stored in the freezer. It can be frozen in a piece. But then it’s a long time to wait until it unfreezes, but I’m interested in starting to bake faster as I think. I divide my dough into small pieces and roll up balls from them. Great, we got blanks for buns and pies.

I put them on a baking sheet, cover with cling film and put in the freezer to freeze.
After an hour I get it, now you can lay it out in packages, they will not stick to each other. If you will also use an iron pan, use gloves or a mitten. I once grabbed a baking sheet from the freezer with a wet hand, and the temperature in my cell was minus 18 degrees C, of \u200b\u200bcourse, the skin froze right away, it was very unpleasant, but it worked out.
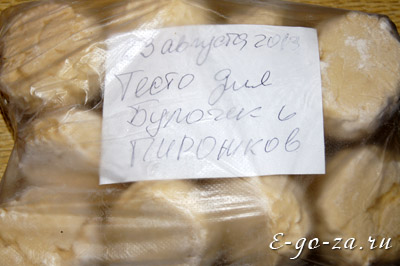 I put a piece of paper in the bag with a note when it’s cooked and for what, time flies quickly, and you can forget it.
 I release the excess air and seal it with tape.
Such dough balls are very convenient. They quickly defrost and rise. They can be taken individually, if you do not want to cook from the whole test. And if necessary, they can be blinded together and rolled into one layer. And it’s more convenient to store, you can distribute the bags in small portions.
 Well, now you can easily bake at a convenient time for you. Do not defrost the dough in a bag, it can get an unpleasant aftertaste of yeast. Put the dough on a powdery table, cover with a napkin and leave to defrost at room temperature. If you want to defrost in the microwave, be careful, elevated temperatures can kill the yeast, and the dough will not rise again.
